X-ACT Manual Map View
Map View
To select Map View, click on the menu and select Map View.The Map View offers a graphical representation of the simulators superimposed on a map of your choosing. It could be a map downloaded from Google Maps or any other online provider, or a picture of a hand drawn map.
The app is installed with a sample map. To use it, click on the menu, select Pick New Map and select "map_sample.png".
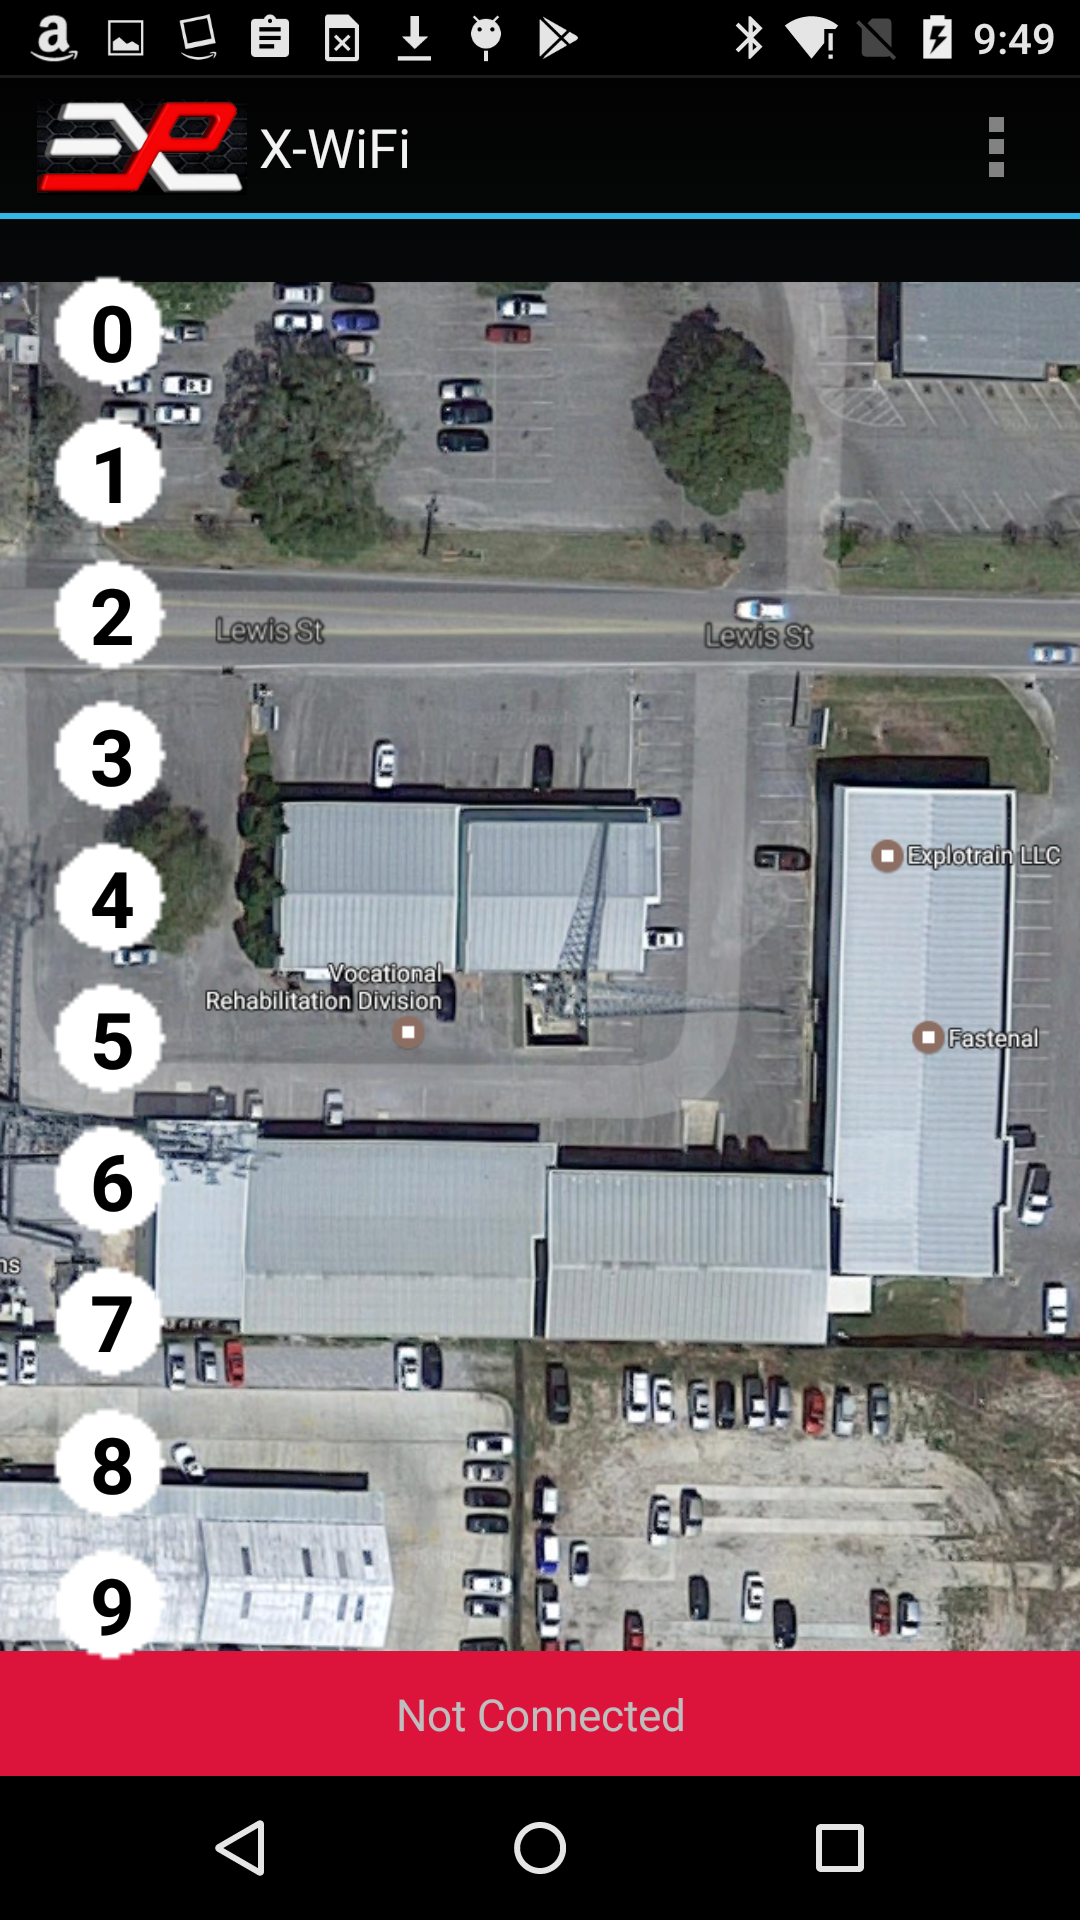
Figure 5: Map View, sample map
The sample map is intended to be used in the portrait orientation.For best appearance, the map should be scaled for the device you are using. To find out the optimum size, click on Help with Maps in the menu after having selected Map View. The Help box indicates the optimum resolution for your device.
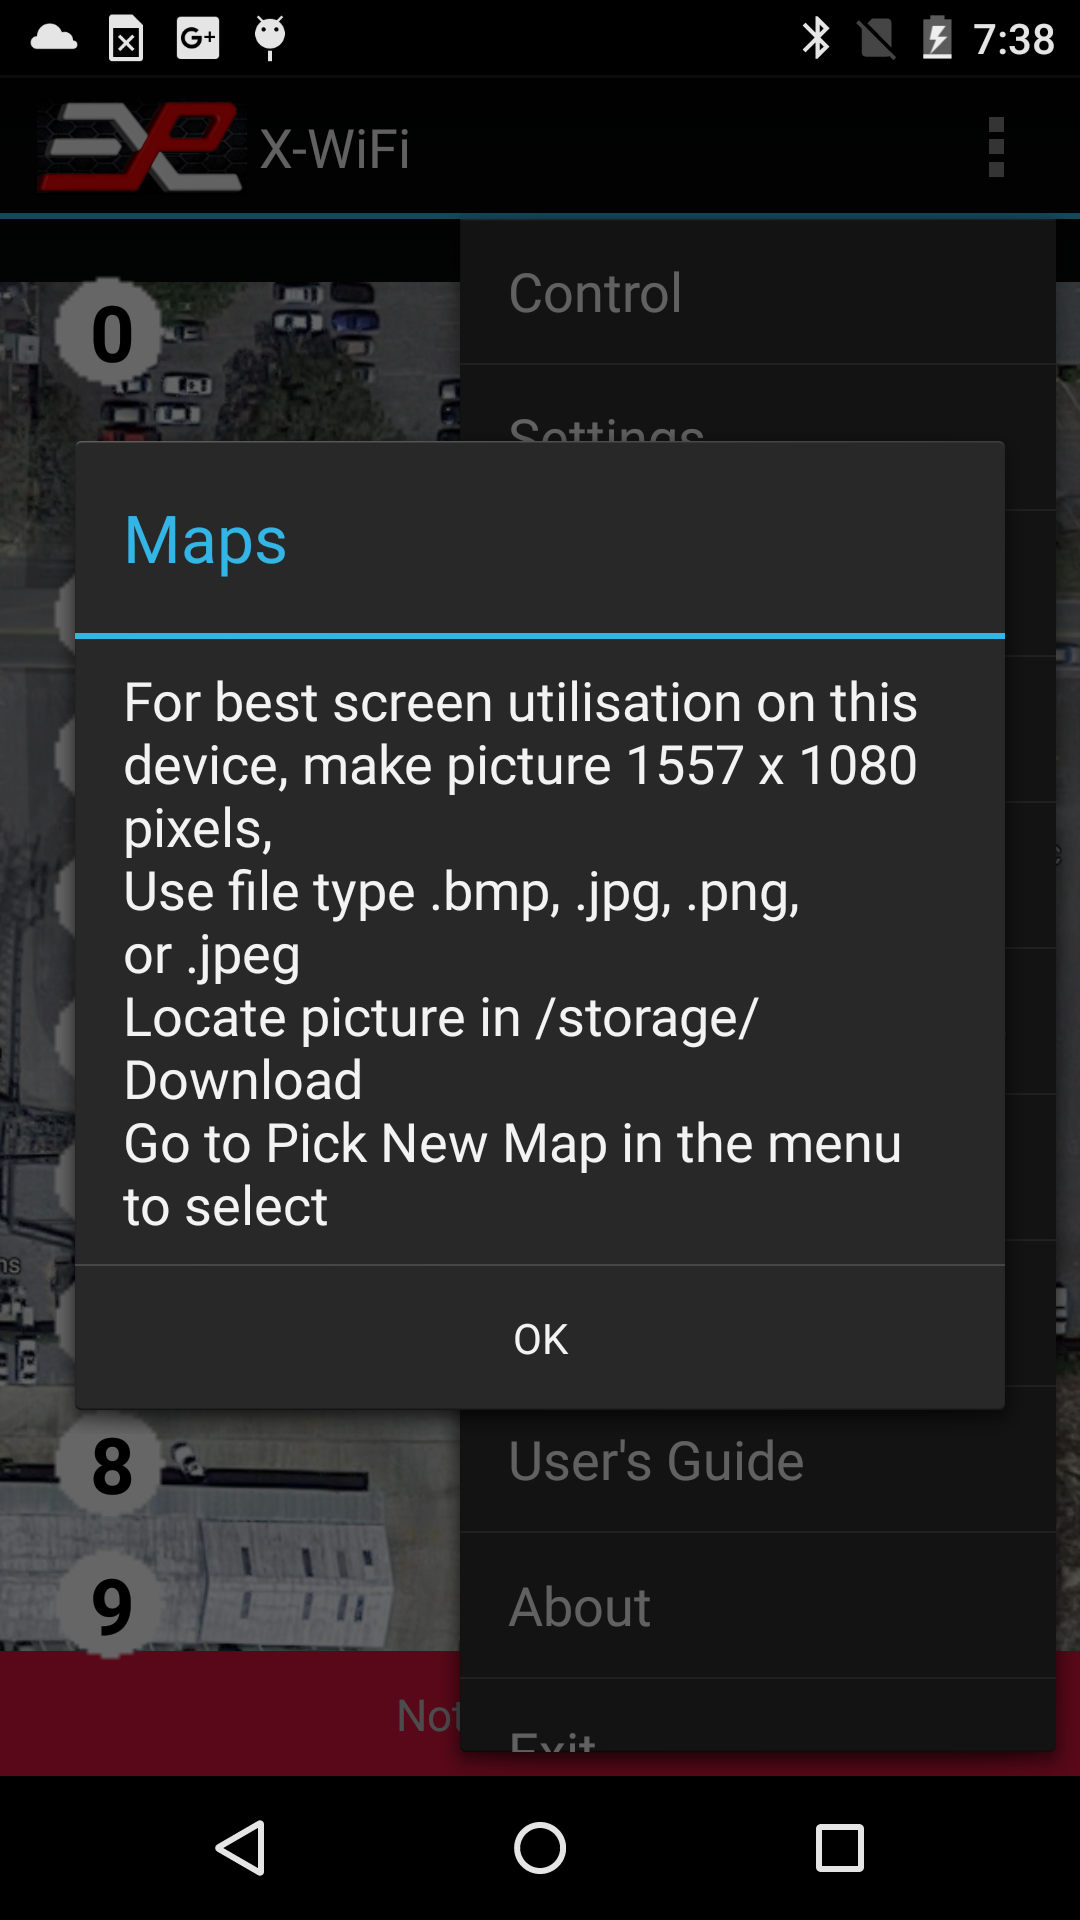
Figure 6: Map View, Help with Maps
Note that the map size and dimensions should account for the orientation of the device. You will normally have two different maps if you want to use the device in portrait and landscape mode.Also it is OK to use a map with smaller, scaled dimensions. For instance, if the app reports the optimum dimensions to be 1557x1080, it is OK to use a map that is 778x540 or close to these dimensions. The first dimension is the vertical dimension followed by the horizontal dimension.
The number of simulators that can be displayed on the map (10 or 16) depends on the "10/16 Units" setting accessible from the Control screen.
Organizing the icons
Once you have loaded a map, the icons will be initially lined up to the side or the top of the display, depending on the tablet's orientation. If you cannot see all the icons, click on Reset Icons in the menu. Note that if the app is currently connected to the X-ACT Bridge Controller, only the icons for the connected simulators will be visible. To see all the icons, go back to Control and disconnect before returning to Map View.You can move any icon into a specific location on the map by selecting "Move Icons" in the menu. Once Move Icons has been selected, the top of the display has a banner indicating you are in the Move Icon mode.

Figure 7: Map View, moving the icons
Simply touch the icon for the simulator you want to move. The number corresponds to the simulator's address. Then touch the display in the location where you want to move the icon to.Once you have moved the icons in the desired position, select "Save Icons Positions" in the menu. The icon positions are not associated with a particular map, so if you change the map, the icons will not automatically reposition themselves.
Note that the Map View is setup for a particular orientation, portrait or landscape.
Operating the X-ACT Bridge Controller through the app's Map View mode
The graphic in the simulator's icon indicates the simulator's state as follows:- White circle: IDLE
- Green circle: ARMING or ARMED
- Red circle: FAULT
- Red flame: FIRING or FIRE DELAY.
- Short press: alternates between IDLE and ARMED
- Long Press: Fires if the simulator was ARMED, or do nothing if the simulator is in IDLE state.